
Are you ready for a tasty start to your day? These make-ahead breakfast zucchini and cheese scones are the perfect solution! With fresh ingredients and simple steps, you’ll have a delicious meal ready in no time. I'll guide you through the process, offer tips, and share yummy variations. Let’s dive into this easy recipe that will make breakfast both fun and healthy. Your mornings will never be the same!
Ingredients
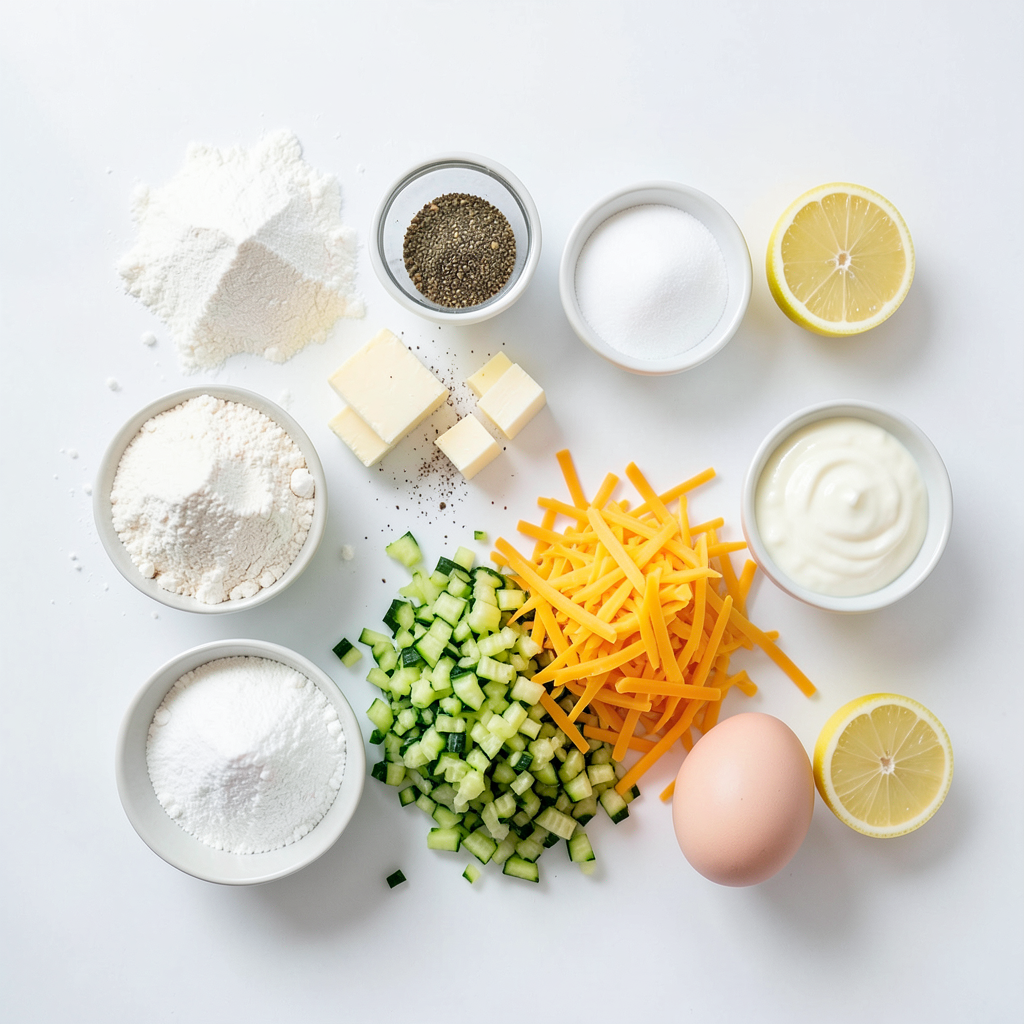
Essential Ingredients for Zucchini and Cheese Scones
To make these tasty scones, you need the following:
- 2 cups all-purpose flour
- 1 tablespoon baking powder
- 1/2 teaspoon baking soda
- 1 teaspoon salt
- 1/2 teaspoon black pepper
- 1 teaspoon dried oregano
- 1/2 cup unsalted butter, chilled and cubed
- 1 cup grated zucchini (squeezed dry)
- 1 cup shredded sharp cheddar cheese
- 1/3 cup plain Greek yogurt
- 2 large eggs
- 1 tablespoon fresh lemon juice
These ingredients work together to create soft, savory scones. The zucchini adds moisture, while the cheese gives flavor.
Alternative Ingredients to Consider
If you want to mix things up, try these options:
- Use whole wheat flour for a nuttier taste.
- Swap sharp cheddar for feta or mozzarella.
- Substitute Greek yogurt with sour cream or buttermilk.
These alternatives can change the flavor and texture, so feel free to experiment!
Tips for Selecting Fresh Zucchini and Cheese
When choosing zucchini, look for:
- Firmness with smooth skin.
- A bright green color without blemishes.
- Smaller sizes for better flavor.
For cheese, pick:
- A block of cheddar for the best melt.
- Freshly shredded cheese to avoid additives.
Using fresh ingredients enhances the taste of your scones. Trust your taste buds, and enjoy the process!
Step-by-Step Instructions
Preparation Steps Overview
To make these scones, you need to gather your ingredients. You will need flour, baking powder, baking soda, salt, black pepper, oregano, butter, zucchini, cheese, Greek yogurt, eggs, and lemon juice. Measure everything before you start. This keeps your kitchen tidy and makes the process smooth.
Detailed Baking Instructions
1. Preheat the Oven: Set your oven to 400°F (200°C). This ensures even cooking.
2. Mix Dry Ingredients: In a large bowl, whisk together 2 cups of flour, 1 tablespoon of baking powder, 1/2 teaspoon of baking soda, 1 teaspoon of salt, 1/2 teaspoon of black pepper, and 1 teaspoon of dried oregano.
3. Add Butter: Take 1/2 cup of chilled, cubed butter and add it to the flour mix. Use a pastry cutter or your fingers to blend until it looks like coarse crumbs.
4. Incorporate Zucchini and Cheese: Add 1 cup of grated zucchini and 1 cup of shredded sharp cheddar cheese. Stir gently until they are mixed well.
5. Mix Wet Ingredients: In another bowl, whisk together 1/3 cup of Greek yogurt, 2 large eggs, and 1 tablespoon of fresh lemon juice until smooth.
6. Combine Mixtures: Pour the wet mix into the dry mix. Fold gently until just combined. Avoid overmixing to keep the scones light and fluffy.
7. Shape the Dough: Turn the dough onto a floured surface. Knead it a few times until it holds together. Pat it into a round disc about 1 inch thick.
8. Cut the Scones: Use a sharp knife to cut the disc into 8 wedges. Place them on a lined baking sheet.
9. Bake: Put the scones in the oven and bake for 20-25 minutes. They should look golden brown.
10. Cool Down: Let the scones cool on the baking sheet for a few minutes. Then, transfer them to a wire rack to cool completely.
Visual Aids for Each Step (Optional)
While I can't provide images, you can find pictures of each step online. Visual aids help you see what the dough should look like at each stage. This can boost your confidence as you bake.
Tips & Tricks
How to Achieve the Perfect Scone Texture
To get the best scone texture, keep the butter cold. Use chilled butter and cube it small. This helps create flakiness. Mix the butter into the dry ingredients until it looks like coarse crumbs. Do not overmix the dough after adding wet ingredients. Gently fold until just combined for light scones.
Common Mistakes to Avoid When Baking Scones
One common mistake is overworking the dough. This makes the scones tough. Avoid adding too much flour when kneading. Use just enough to keep it from sticking. Also, be careful not to skip chilling the butter. It’s key for a great texture. Lastly, always preheat your oven. This ensures even cooking.
Serving Suggestions for a Complete Breakfast
These scones shine when served warm. Pair them with herb-infused butter for a tasty touch. You can also add cream cheese or your favorite jam. A fresh fruit salad or some yogurt makes a great side. For a full breakfast, serve with eggs or a smoothie. Enjoy your meal!
Variations
Cheese Variations: What Else Can You Use?
You can change the cheese in your scones to fit your taste. Some great options include:
- Mozzarella
- Feta
- Gouda
- Parmesan
Each cheese brings a unique flavor. For a sharp taste, use aged cheddar. If you prefer a milder flavor, try mozzarella. Mix and match to find your favorite!
Spice and Herb Alternatives
Switching up the spices and herbs can add a fun twist. Consider these options:
- Fresh basil
- Thyme
- Chives
- Red pepper flakes
These can give your scones a different aroma and taste. Fresh herbs add brightness, while spices like red pepper offer heat. Experiment to find what you love most!
Ideas for Adding Other Vegetables
You can include other veggies for added nutrition and flavor. Here are some ideas:
- Carrots
- Spinach
- Bell peppers
- Corn
Grate or chop these veggies finely before adding them to the dough. This way, they blend well without changing the texture. Each veggie brings its own taste, making every batch special!
Storage Info
Best Practices for Storing Scones
To keep your scones fresh, store them in an airtight container. This helps them stay soft. Make sure they cool completely before you store them. If you leave them warm, moisture builds up and makes them soggy. Place a paper towel in the bottom of the container to absorb extra moisture. This way, your scones will remain fluffy and delicious.
How to Reheat Scones for Optimal Taste
Reheating scones is easy. For the best taste, use your oven. Preheat your oven to 350°F (175°C). Place the scones on a baking sheet. Warm them for about 5-10 minutes. This helps restore their crispiness. If you’re in a hurry, you can use a microwave. Heat them for 10-15 seconds. Be careful not to overheat, as they can become tough.
Freezing Instructions and Duration
Freezing scones is a great way to save them for later. Wrap each scone tightly in plastic wrap. Then, place them in a freezer-safe bag. Make sure to remove as much air as possible. They can last up to 3 months in the freezer. When you’re ready to enjoy, just take them out and reheat as mentioned above. Enjoy the fresh taste any time!
FAQs
Can I make the dough in advance?
Yes, you can make the dough ahead of time. After mixing, wrap it tightly in plastic wrap. Store it in the fridge for up to 24 hours. When ready, just cut and bake. This saves time on busy mornings.
How long do leftovers last?
Leftovers stay fresh for about three days. Store them in an airtight container. Keep them at room temperature for the best taste. If you want them warm, reheat in the oven for a few minutes. This will revive their texture.
Can I substitute Greek yogurt with something else?
Yes, you can use sour cream instead of Greek yogurt. It will give a similar creaminess. You can also try buttermilk, but note that the dough may be wetter. Adjust flour as needed if using a different substitute.
What can I serve with these scones?
These scones pair well with herb-infused butter or cream cheese. You can also enjoy them with jam or honey. They make a great side to scrambled eggs or fresh fruit. Try serving them with a hot cup of tea or coffee.
Are these scones suitable for freezing?
Yes, you can freeze these scones. Bake them first, then cool completely. Wrap each scone in plastic wrap and place in a freezer bag. They last up to three months in the freezer. Reheat directly from frozen for a quick snack.
Zucchini and cheese scones are easy to make and tasty. We covered essential ingredients, tips for baking, and storage methods. Remember, using fresh zucchini helps improve flavor and texture. Avoid common mistakes to get the perfect scone. Consider variations to keep things interesting. Whether you freeze them or enjoy them fresh, these scones shine as a delicious breakfast. With this guide, you’re ready to bake some amazing scones yourself. Enjoy your baking!